A beginner's guide to HarmonyOS for Android developers
This article is for Android developers
Be prepared and careful
This article is for Android developers, so I won't go into the basics, and you can check out the documentation.华为开发者联盟
The following content is based on the HarmonyOS development environment (DevEco Studio, HarmonyOS SDK).
The DevEco Studio application signature is bound to a HUAWEI ID, so you need to register a HUAWEI ID before you start (a prompt will be displayed if it fails to run for the first time).
To run a HarmonyOS project, you need a HarmonyOS phone; (At present, only Mate 50 and 60 series mobile phones can be used normally, other models need to use the screen projection tool to operate, and it will be stuck when operated directly on the mobile phone);
Let's start with Hello World
DevEco Studio
Android development is developed using Android Studio, and HarmonyOS also provides a DevEco Studio development tool, which is also developed based on IDEA, so the functional interface and Android Studio are available It's pretty much the same, it's easy to get started, and you can select the official template library from the menu and download it to run locally.Import Sample
Download the tool: Download and upgrade the HUAWEI DevEco Studio and SDK | Huawei Developer Alliance
Create a project
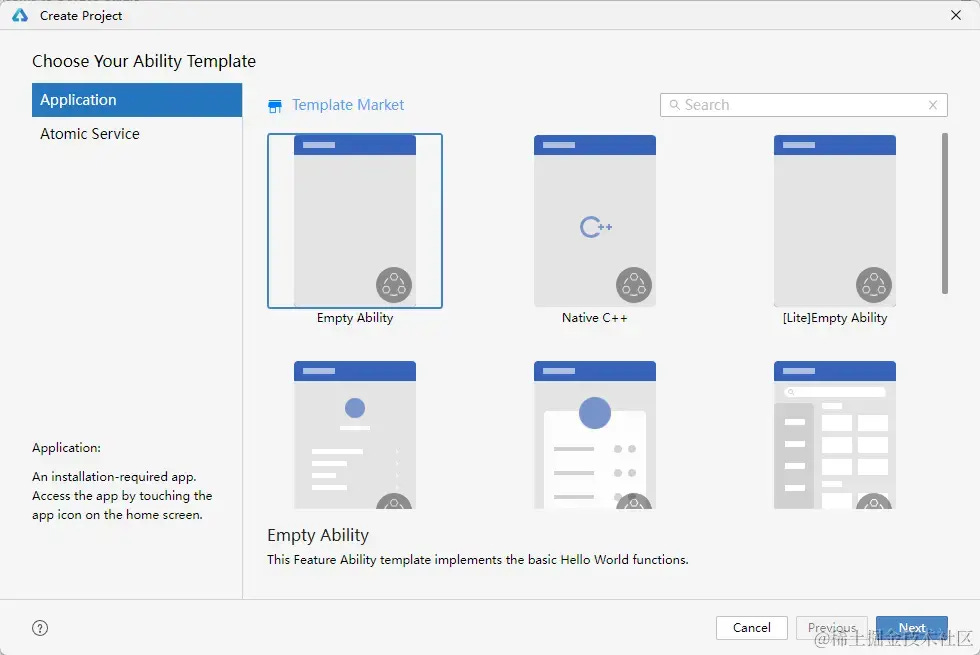
Click on the welcome screen, the process of creating a new project is also similar to Android Studio, the UI component here is similar to Android , which is used to provide UI display and life cycle callbacks, here we simply use the default template to create a Demo project;Create ProjectAbilityActivity
Bundle name Equivalent to Android , the project name and save location can be selected, and other configurations can be left default to complete the project creation.package name
Project structure
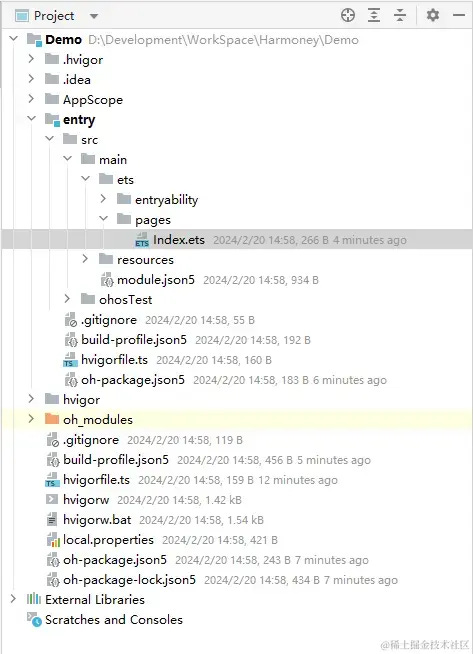
Once the project is created, you will see the following project directory structure, which looks like a lot of files, but we only need to focus on the important parts;
PROJECT_FILE_TREE
Demo/build-profile.json5The project configuration file, which is equivalent to the one in the Android project:settings.gradle.kts
jsonCode interpretation
Copy the code
{ "app": { "signingConfigs": [], // 签名配置 "compileSdkVersion": 9, // SDK 版本配置 "compatibleSdkVersion": 9, // SDK 版本配置 "products": [ { "name": "default", "signingConfig": "default", } ] }, "modules": [ // 模块配置 { "name": "entry", // 模块名 "srcPath": "./entry", // 模块路径 "targets": [ { "name": "default", "applyToProducts": [ "default" ] } ] } ] }
Demo/AppScopeThe path where the global resources and configurations are stored;Demo/AppScope/resourcesapply global resource paths;Demo/AppScope/app.json5Application configuration, define the package name, version, application icon, name, etc.:
jsonCode interpretation
Copy the code
{ "app": { "bundleName": "com.sample.demo", // 包名 "vendor": "example", // 供应商 "versionCode": 1000000, // 版本号 "versionName": "1.0.0", // 版本名 "icon": "$media:app_icon", // 应用图标,此处配置影响应用管理中显示 "label": "$string:app_name" // 应用名,此处配置影响应用管理中显示 } }
Icons used:
Name Resources:
jsonCode interpretation
Copy the code
{ "string": [ { "name": "app_name", "value": "Demo" } ] }
In App Management:
Demo/entryThe main module of the application, the application entrance, and the path to store the code and resources;Demo/entry/src/main/module.json5Module configuration files, similar to those in Android projects:AndroidManifest.xml
jsonCode interpretation
Copy the code
{ "module": { "name": "entry", // 当前module的名字,module打包成hap后,表示hap的名称,标签值采用字符串表示(最大长度31个字节),该名称在整个应用要唯一 "type": "entry", // 表示模块的类型,类型有三种,分别是entry、feature和har "srcEntry": "./ets/DemoAbilityStage.ts", // 模块的入口文件路径,默认没有,需要手动创建,类似 Android 中的 Application "description": "$string:module_desc", // 当前模块的描述信息 "mainElement": "EntryAbility", // 该标签标识hap的入口ability名称或者extension名称。只有配置为mainElement的ability或者extension才允许在服务中心露出 "deviceTypes": [ // 该标签标识hap可以运行在哪类设备上 "phone", "tablet" ], "deliveryWithInstall": true, // 该模块是否随应用一起安装 "installationFree": false, // 释放支持免安装 "pages": "$profile:main_pages", // ability 中使用的 page 信息配置 "abilities": [ // ability 配置列表,类似 Android 中的 Activity 列表 { "name": "EntryAbility", // 逻辑名,整个应用要唯一 "srcEntry": "./ets/entryability/EntryAbility.ts", // 入口代码路径 "description": "$string:EntryAbility_desc", // 描述信息 "icon": "$media:icon", // 图标,如果为 MainElement,必填,此处配置影响应用列表显示及任务栈显示 "label": "$string:EntryAbility_label", // 标签名,此处配置影响应用列表显示及任务栈显示 "startWindowIcon": "$media:icon", // 启动页图标 "startWindowBackground": "$color:start_window_background", // 启动页背景颜色 "exported": true, "skills": [ { "entities": [ "entity.system.home" ], "actions": [ "action.system.home" ] } ] } ] } }
Icons used:
Name Resources:
jsonCode interpretation
Copy the code
{ "string": [ { "name": "EntryAbility_label", "value": "Ability1" } ] }
Display on desktop:
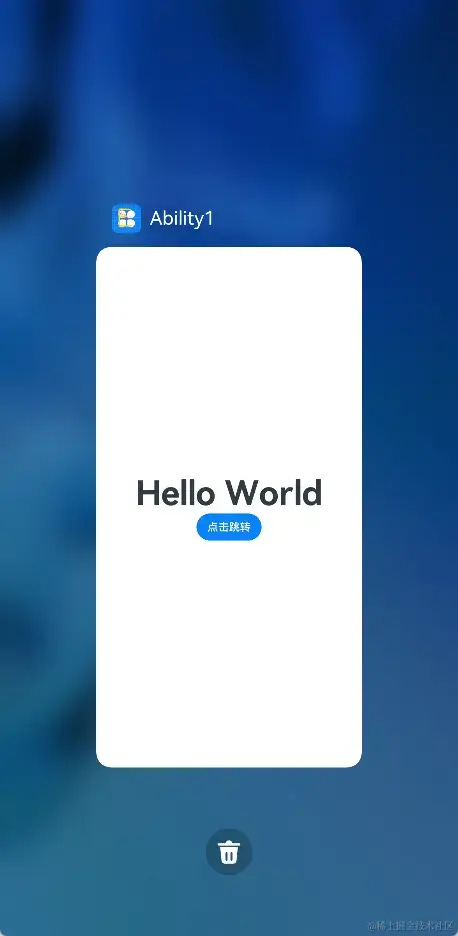
In the task stack displays:
If there is more than one , all icons will be created on the desktop:UIAbilityskillsentity.system.home
bashCode interpretation
Copy the code
"skills": [ { "entities": [ "entity.system.home" ], "actions": [ "action.system.home" ] } ]
Demo/entry/src/main/etssource code file path;Demo/entry/src/main/ets/entryability/EntryAbility.tsUI components, similar to the one in Android;ActivityDemo/entry/src/main/resourcesresource file path;
Project architecture and comparison with Android
From the perspective of the overall project architecture, the HarmonyOS project is relatively close to the Compose + single-activity architecture of the Android project, and we can also find some corresponding relationships with the Android project in HarmonyOS:
AndroidHarmonyOSsettings.gradle.ktsProject configuration filesDemo/build-profile.json5The project configuration file, except that the application signature, SDK version, and multi-channel configuration have been moved herebuild.gradle.ktsModule configuration filesDemo/AppScope/app.json5Apply the configuration file, configure the package name, version, icon, and nameAndroidManifest.xmlManifest fileDemo/entry/src/main/module.json5Configure the module configuration file and configure the application entry and routeApplicationApplication entryAbilityStageApplication entryActivityUI componentsUIAbilityUI componentsNavgationPage routingpagesPage routing
life cycle
In the node declaration in , we can also configure a global application entry just like an Android app, with similar lifecycle method callbacks:module.json5modulesrcEntry
jsxCode interpretation
Copy the code
import AbilityStage from '@ohos.app.ability.AbilityStage'; export default class DemoAbilityStage extends AbilityStage { onCreate() { // 应用启动回调 } }
UI components in HarmonyOS have a similar lifecycle to Android:UIAbilityActivity
jsxCode interpretation
Copy the code
import UIAbility from '@ohos.app.ability.UIAbility'; import hilog from '@ohos.hilog'; import window from '@ohos.window'; export default class EntryAbility extends UIAbility { onCreate(want, launchParam) { // 组件创建 hilog.info(0x0000, 'testTag', '%{public}s', 'Ability onCreate'); } onDestroy() { // 组件销毁 hilog.info(0x0000, 'testTag', '%{public}s', 'Ability onDestroy'); } onWindowStageCreate(windowStage: window.WindowStage) { // window 创建 // Main window is created, set main page for this ability hilog.info(0x0000, 'testTag', '%{public}s', 'Ability onWindowStageCreate'); // 设置布局,显示 ets/pages/Index.ets 的布局 windowStage.loadContent('pages/Index', (err, data) => { if (err.code) { hilog.error(0x0000, 'testTag', 'Failed to load the content. Cause: %{public}s', JSON.stringify(err) ?? ''); return; } hilog.info(0x0000, 'testTag', 'Succeeded in loading the content. Data: %{public}s', JSON.stringify(data) ?? ''); }); } onWindowStageDestroy() { // window 销毁 // Main window is destroyed, release UI related resources hilog.info(0x0000, 'testTag', '%{public}s', 'Ability onWindowStageDestroy'); } onForeground() { // 进入前台 // Ability has brought to foreground hilog.info(0x0000, 'testTag', '%{public}s', 'Ability onForeground'); } onBackground() { // 进入后台 // Ability has back to background hilog.info(0x0000, 'testTag', '%{public}s', 'Ability onBackground'); } }
HarmonyOS does not have a lifecycle callback method in Android, but there are still solutions to implement it if needed, which need to be implemented in the method:UIAbilityActivityonResumeonPauseonWindowStageCreatewindowStage
dartCode interpretation
Copy the code
onWindowStageCreate(windowStage: window.WindowStage) { windowStage.on('windowStageEvent', (event) => { // event 取值为枚举类型 window.WindowStageEventType if(event === window.WindowStageEventType.ACTIVE) { // 获取焦点 } else { // 失去焦点 } }) }
layout
HarmonyOS uses ArkTS as the development language and provides ArkTS UI components for UI layout, as shown in the layout above:UIAbilityets/pages/Index.ets
kotlinCode interpretation
Copy the code
@Entry // 声明这个组件可作为页面入口,即在 UIAbility 中加载或进行页面跳转 @Component // 声明这是一个UI组件 struct Index { @State message: string = 'Hello World' build() { // 声明布局 Row() { // 横向布局 Column() { // 竖向布局 Text(this.message) // 文本控件 .fontSize(50) .fontWeight(FontWeight.Bold) } .width('100%') // 宽度铺满 } .height('100%') // 高度铺满 } }
The above is the default generated layout of the new project, the effect is to display the text in the middle of the screen, and more components can be referred to the component reference (declarative development paradigm based on ArkTS.Hello World
The interface jumps
Pages jump
In the projects generated by HarmonyOS, there is only one by default, and the display layout is loaded through , so a multi-interface approach is to write different pages and jump directly to different pages.UIAbilitywindowStage.loadContent
First, let's create a new file under the path, declare the layout with reference, and add a button to go back to the previous level:ets/pagesSecond.etsIndex.ets
tsxCode interpretation
Copy the code
import router from '@ohos.router' @Entry @Component struct Second { @State message: string = 'Second Page' build() { Row() { Column() { Text(this.message) .fontSize(50) .fontWeight(FontWeight.Bold) // 添加按钮 Button("点击返回") .onClick(() => { // 按钮点击通过 router 返回上一级 router.back() }) } .width('100%') } .height('100%') } }
Then, we need to add the declaration of this interface to the file:resources/base/profile/main_pages.json
jsonCode interpretation
Copy the code
{ "src": [ "pages/Index", "pages/Second" ] }
Add a button to the previous layout and configure the click-to-jump logic:Index.ets
tsxCode interpretation
Copy the code
import router from '@ohos.router' @Entry @Component struct Index { @State message: string = 'Hello World' build() { Row() { Column() { Text(this.message) .fontSize(50) .fontWeight(FontWeight.Bold) // 添加按钮 Button("点击跳转") .onClick(() => { // 按钮点击通过 router 跳转到 pages/Second router.pushUrl({ url: "pages/Second" }) }) } .width('100%') } .height('100%') } }
In this way, you can jump to the interface by clicking the button. It is recommended to create a Page in the Path Use, which will automatically generate the corresponding layout file and configuration, which is more convenient and less error-prone.ets/pagesNew -> Page
UIAbility Jump
Although there is only one template officially provided by HarmonyOS, it still supports many.UIAbilityUIAbility
Similarly, create a new one under the path, load the layout in , and add the corresponding configuration in , which is still recommended to be created;etsEntryAbility.tsSecondEntryAbility.tsonWindowStageCreatepages/SecondAblitymodule.json5New -> Ability
Modify the text and add a back button in :ets/pages/SecondAbility.ets
tsxCode interpretation
Copy the code
import common from '@ohos.app.ability.common' @Preview @Entry @Component struct SecondAbility { @State message: string = 'Second Ability' build() { Row() { Column() { Text(this.message) .fontSize(50) .fontWeight(FontWeight.Bold) Button("点击返回") .margin({ top: 30 }) .onClick(() => { // 按钮点击关闭当前 UIAbility let context = getContext(this) as unknown as common.UIAbilityContext context.terminateSelf() }) } .width('100%') } .height('100%') } }
Then we modify the code in to add a new button below the previous button and click Jump:ets/pages/Index.etsSecondEntryAbility
tsxCode interpretation
Copy the code
import common from '@ohos.app.ability.common' import Want from '@ohos.app.ability.Want' @Entry @Component struct Index { @State message: string = 'Hello World' build() { Row() { Column() { Text(this.message) .fontSize(50) .fontWeight(FontWeight.Bold) Button("点击跳转") .onClick(() => { // 按钮点击跳转到 SecondEntryAbility let context = getContext(this) as unknown as common.UIAbilityContext let want: Want = { deviceId: "", bundleName: "com.sample.demo", abilityName: "SecondEntryAbility", } context.startAbility(want) }) // 添加按钮 Button("点击跳转Ability") .onClick(() => { // 按钮点击跳转到 SecondEntryAbility let context = getContext(this) as unknown as common.UIAbilityContext let want: Want = { deviceId: "", bundleName: "com.sample.demo", abilityName: "SecondEntryAbility", } context.startAbility(want) }) } .width('100%') } .height('100%') } }
Here we are going to mention the difference between and , although they are both UI components, but in HarmonyOS, each open will be displayed separately in the task stack;UIAbilityActivityUIAbility
summary
As an Android developer, I'm looking for the similarities between HarmonyOS and Android development when I write this article, and we don't need to learn about HarmonyOS from scratch development, you can start faster.
Finally, share a HarmonyOS development study guide
Pay attention to VX public account: Android Lao Pi
HarmonyOS Development Learning Guide
Chapter 1 Quick Start
1. Preparation for development
2. Build the first ArkTS application (Stage model)
3. Build the first ArkTS application (FA model)
4. Build the first JS application (FA model)
5、........
Chapter 2 Basic Knowledge of Development
1. Basic knowledge of application packages
2. Application configuration file (Stage model)
3. Overview of application configuration files (FA model)
4、.......
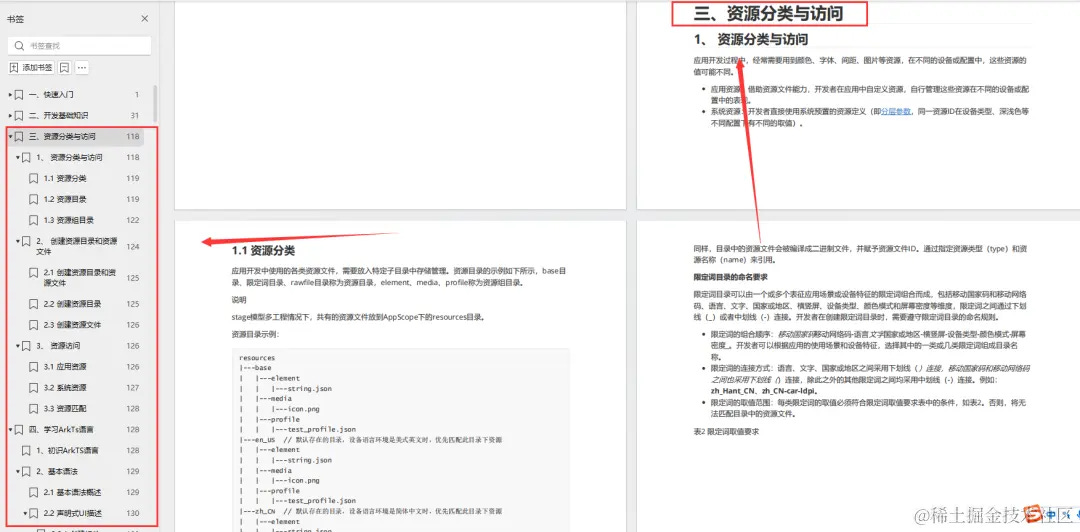
Chapter 3 Resource Classification and Access
1. Resource classification and access
2. Create resource directories and resource files
3. Resource access
4、.......
Chapter 4 Learning the ArkTs language
1. Familiarize yourself with the ArkTS language
2. Basic grammar
3. State management
4. Other status management
5. Rendering control
6、......
Chapter 5 UI Development
1. Overview of the Ark Development Framework (ArkUI).
2. Based on the ArkTS declarative development paradigm
3. Compatible with JS-like web development paradigm
4.......
Chapter 6 Web Development
1. Overview of web components
2. Use the web component to load the page
3. Set the basic properties and events
4. Use front-end page JavaScript in your app
5. Overview of the basic class library of the ArkTS language
6. Concurrency
7.......
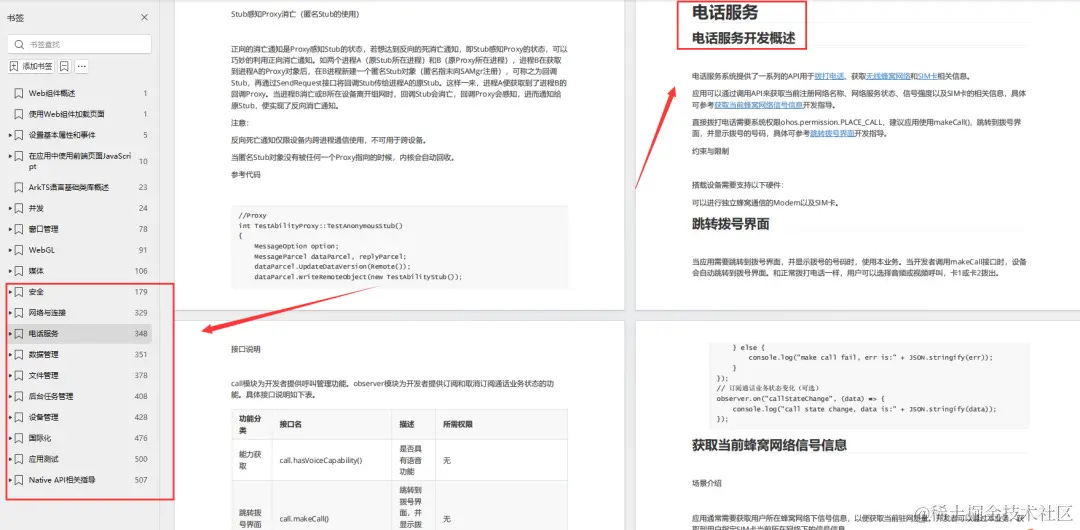
11. Networks and Connections
12. Telephone Service
13. Data Management
14. Document Management
15. Background task management
16. Device Management
17......
Chapter 7 Application Models
1. Overview of the application model
2. Stage model development guidance
3. FA model development guidance
4.......
Label:
作者:用户26245236817
链接:https://juejin.cn/post/7348363874963783680
来源:稀土掘金
著作权归作者所有。商业转载请联系作者获得授权,非商业转载请注明出处。


